Just a short post today, because today has been loooong… and it hasn’t even had any cooking in it. Of course, it might have felt less loooong if I hadn’t decided last night that the best solution to ‘where can we all go for dessert?’ was ‘I can make cupcakes! Vegan, gluten-free cupcakes! Also my house is full of confectionery! Let’s go to my place!’. Needless to say, we were all bouncing off the walls for a while after that, and I really was not my best at choir this morning.
Anyway, I made lemon curd a few weeks ago, to go with the dozens and dozens of scones, and took photos of it, but never wrote it up. So now is definitely the time. Besides, lemon curd is one of those things that is really, really tricky until you figure out how easy it is. All that rubbish about ‘until it is thick enough to coat the back of a spoon’ doesn’t help much either. I don’t know about you, but I never did figure out just how thick that was. So here’s my microwave method, which I promise you will work – just don’t do what I do and wander off to do something else in the middle and forget to take it out of the microwave and stir it.
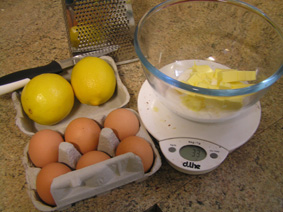
Your Shopping List
 have to make meringues out of those egg-whites? See below for a recipe – in the meantime, just save them in a clean, metal or glass bowl.)
75g caster sugar
40g butter
60ml lemon juice (about one juicy lemon)
Now what will you do with it?
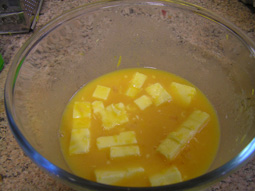
Zest and juice the lemon, and put in a microwave safe bowl with the sugar and chopped butter. Stir around a bit before adding the egg yolks (if you add the egg-yolks directly to the sugar they ‘burn’. I don’t know why, but the effect isn’t nice).
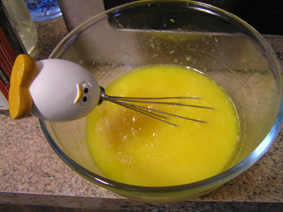
Whisk everything together well – the butter will make it lumpy, but that’s OK – you just don’t want big bits of un-mixed egg-yolk floating around.
Put the bowl in the microwave on about 50%. Cook for about 5 – 8 minutes, stopping the microwave every minute to whisk everything. You’ll find the butter will melt after a couple of minutes, and then it’s just a matter of waiting until the mixture thickens.

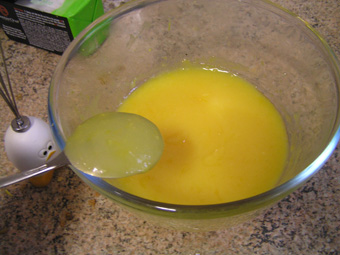
Butter has melted, but the curd is still pretty liquid. Grumpy egg-whisk says: cook it a bit longer!
It will thicken quite noticeably, and be on the verge of bubbling (if it starts bubbling, it is definitely done, and you should stop at once). You’re aiming for a consistency that is a bit gel-like, rather than thickly liquid – it should set a bit once cooled to the point where you can spread it on a cheesecake or a scone and it won’t slowly slide or run off.
Cover the surface directly with glad-wrap, to prevent a skin forming, and put in the fridge to cool. It will set a bit more firmly.
You can eat this spread on toast, as a filling for cupcakes (think lemon butterfly cakes), as a topping for a plain or lemon cheesecake, or as the filling for a lemon meringue pie or lemon meringue cupcakes. This recipe doesn’t make a huge amount – maybe 300ml? – which is good, because while it keeps for a couple of weeks in the fridge, it doesn’t keep like jam and you don’t want it going off.
Now, about those egg-whites…
Meringue. Meringue is good, and much easier than you might think, and do you really want to waste all that fiddly separating of eggs? Of course you don’t.
Start with the egg-whites at room temperature, and put in a glass or metal bowl with 60g caster sugar or icing sugar per meringue. On the subject of bowls, I have so much to tell you, O my readers! According to the McGee book which I am obsesssing over, a plastic bowl is a bad idea, because plastic and fat are both made from hydrocarbon chains, and thus plastic tends to hold onto little bits of fat even when the bowl is clean – and fat makes your egg-whites misbehave themselves. Conversely, a copper bowl gives you a highly stable (ie, hard to over-beat), slightly yellow meringue, because the egg-white starts collecting copper ions (apparently, an iron bowl gives you a pink meringue that isn’t very stable at all), which it likes very much! Unfortunately, copper isn’t terribly good for humans, so a better way of stabilising your meringue is a pinch of cream of tartar, which does the same thing, only with less toxicity.
Aren’t you glad you know that?
Anyway, beat your egg-whites with a pinch of cream of tartar until you have nice stiff peaks (don’t go turning the bowl upside down, though – you don’t need to take the egg that far, and it’s asking for trouble if you incorrectly assess the solidity of the foam), and then add the sugar *gradually*. This means me, too. I’m impatient. Add about 1 tablespoon at a time, and incorporate it before adding the next. You’re aiming for a nice, glossy mixture that is stiff enough to hold its shape when you either pipe or plop meringues onto the tray. Which, incidentally, should be covered with greaseproof paper.
You can pipe meringues, or make little meringue nests with a hollow in the middle (for lemon curd, of course!). Bake at about 110°C for an hour and a half or so – it depends a bit on how big your meringues are; you want them to be completely dried out. You can’t go wrong leaving them to cool in the switched-off oven overnight.
(I regret to say that having made no meringues recently, grumpy egg-whisk is not available to illustrate this treatise. We’ll bring him back for an upcoming post on Pavlova.)
(hmm, that wasn’t really a short post, was it?)
Edit – Oops, never did any variations! You could make orange or lime curd to this recipe, but I wouldn’t try blood orange curd if I were you – I am reasonably certain it would turn green due to the eggs. Then again, you might be lucky – the egg-whites are the really alkaline part, so making a curd with egg-yolk alone should dodge that bullet. I think pink grapefruit curd would be rather good, too.
And no, this recipe is far from vegan. Unfortunately, I don’t think it could be made vegan, either. I’ve seen recipes using a more complex method that use coconut oil instead of butter, so dairy-free may be a possibility, but you’re making a sort of custard here, and I’m pretty sure custard requires eggs.


6 comments for “Recipe: Microwave Lemon Curd, with bonus meringue”